Add custom branding
Updated October 16, 2026
What you need
- A Pro or Teams plan.
- Your logo as a PNG, JPEG, or WebP file, ideally wide and on a transparent background.
Add your branding, step by step
Open Branding
Click Settings in the top bar, then Branding. The page shows how a signing email and the signing page will look, with a sample company until you add your own logo.
Add your company name and logo
Type your company name. It appears in place of your logo if an email app doesn't load images. Then click Choose image and pick your logo file.
Frame your logo
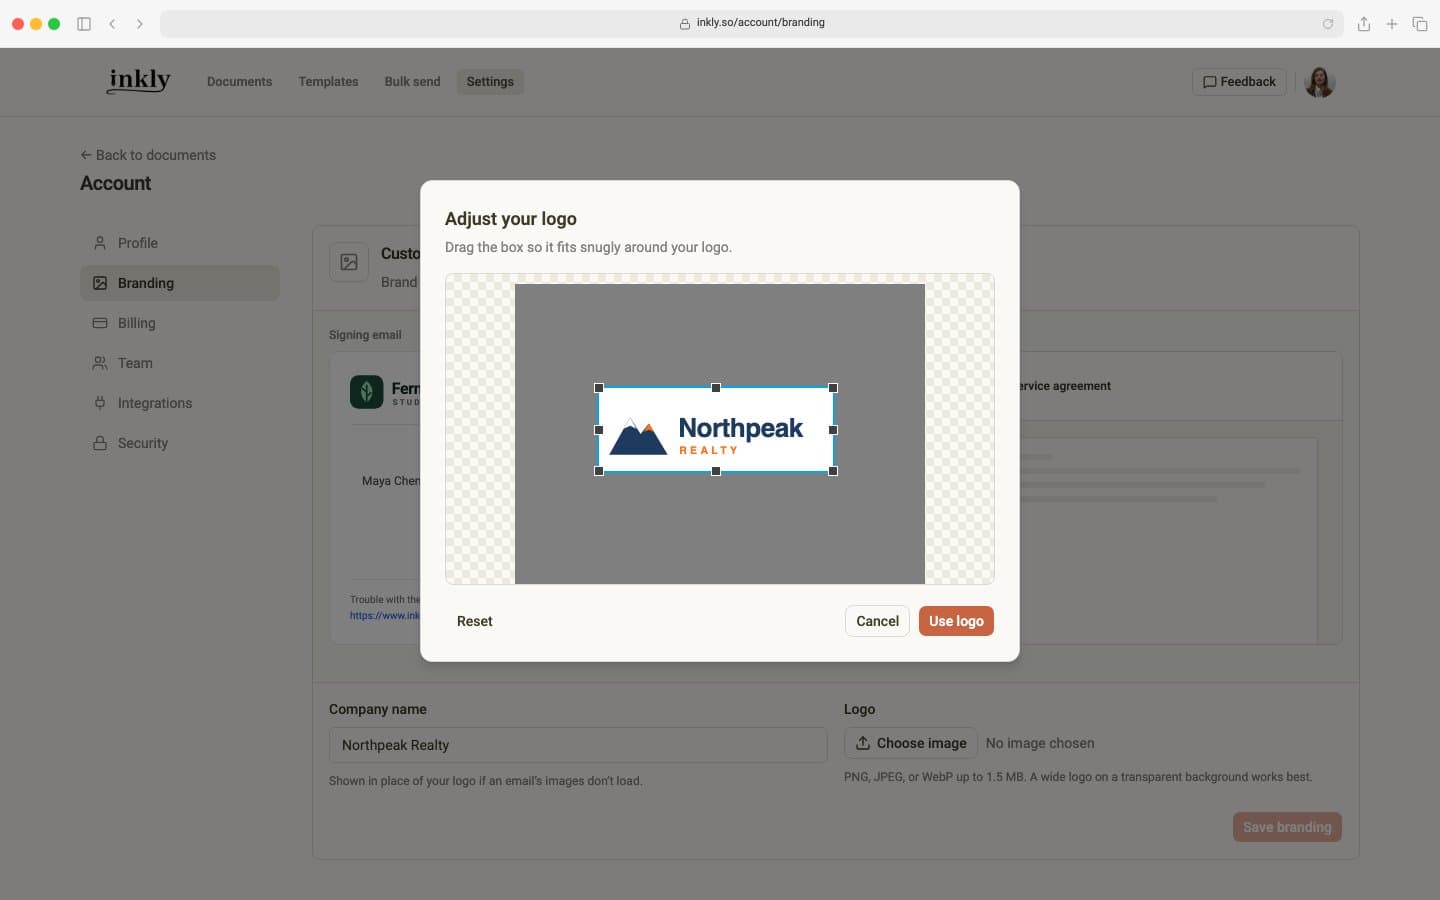
The Adjust your logo window opens with a box already fitted around your logo, so empty space around it is left out. Drag the box or its corners to adjust it, or click Reset to go back to the automatic fit. Then click Use logo.
Save it
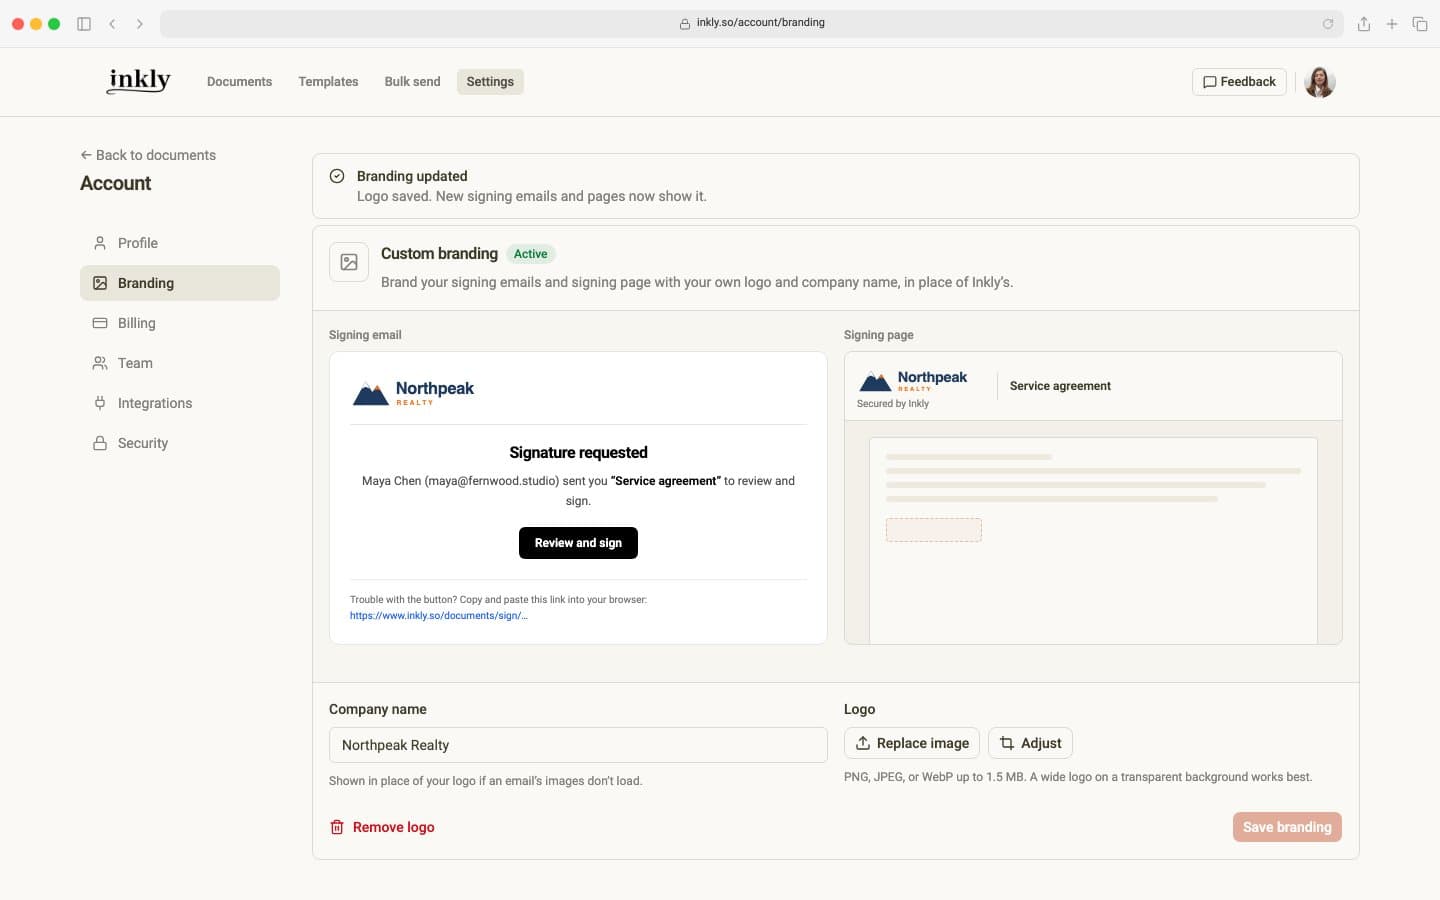
Check the preview, then click Save branding. The status changes to Active, and every signing email and signing page you send from then on shows your logo.
Where signers see your logo
Your logo replaces Inkly's at the top of the signing invitation, reminders, and the emails signers get when their part or the whole document is complete. On the signing page it sits in the header with Secured by Inkly beneath it, so signers can see which service is handling the signature.
Emails you receive yourself, such as alerts when someone signs, keep Inkly's branding.
Change or remove your logo
On Branding, click Adjust to reframe your current logo, or Replace image to upload a new one. You can also change the company name on its own and click Save branding. To go back to Inkly's logo, click Remove logo.