Send documents in bulk
Updated October 7, 2026
What you need
- A Pro or Teams plan.
- A template with every signer's fields placed. See how to create a reusable template.
- Your list of people in a spreadsheet you can save as a CSV.
How your spreadsheet fills each document
Bulk send makes one separate document per spreadsheet row, all from the same template. Each row gives the signers' emails and, optionally, their names.
For details that are different for each person, like a unit number or a rent amount, the template uses Fill in myself fields. To make one, place a Text field in the template, select it, and turn on Fill in myself in the side panel. That means you supply the value, not the signer, so signers see it already filled in. Give it a Field label, such as Monthly rent. You can leave Value empty: when you bulk send, each spreadsheet row supplies its own value.
Every Fill in myself field becomes a column, named after its label in lowercase with underscores for spaces. Monthly rent becomes the monthly_rent column, and each row's value lands in that person's copy.
| Column | What it fills | Status |
|---|---|---|
| party_1_email | The first signer's email | Required |
| party_1_name | The first signer's name | Optional |
| unit | A Fill in myself field labeled Unit | Required |
| monthly_rent | A Fill in myself field labeled Monthly rent | Required |
A template with two signers also has party_2_email and party_2_name, and so on. You never have to type these yourself: Inkly gives you a CSV template with the right header row.
Send in bulk, step by step
Choose a template
Open Bulk send in the top bar, click New bulk send, and choose the template to send. You can also start from a template's ⋯ menu on the Templates page.
Fill in the CSV template
Click Download CSV template and open it in Excel, Numbers, or Google Sheets. Add one row per document, with each signer's email. Open What columns do I need? to see what each column fills and which are required.
Upload it
Save the sheet as a CSV, then drop it on the page or click to choose it. If the file itself has a problem, such as a missing required column, Inkly lists each one by row and column so you can fix it and upload again. Then click Continue.
Check the preview
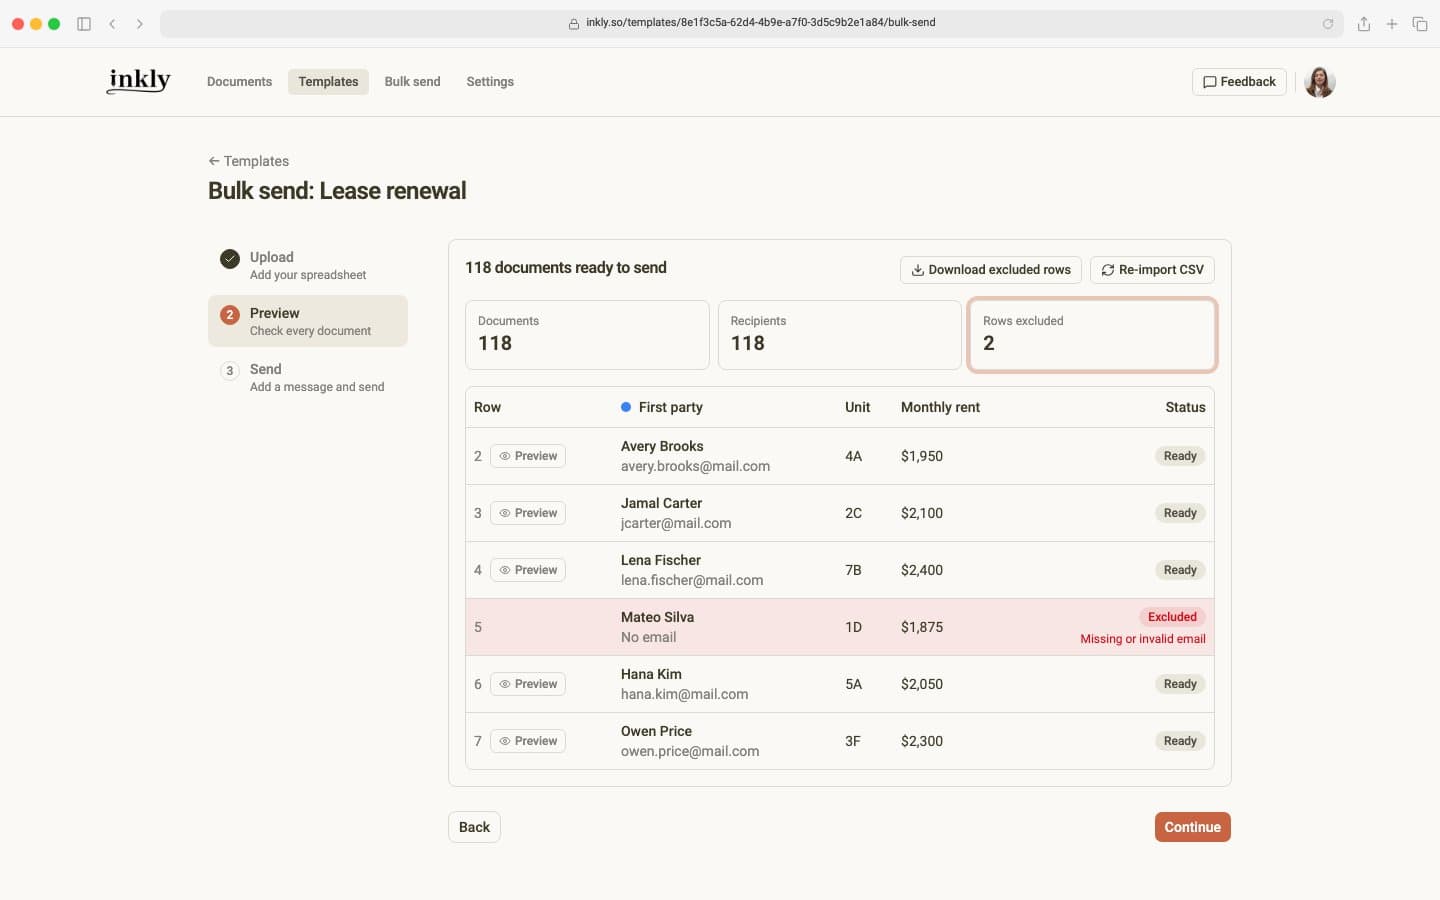
The preview counts the documents and recipients and lists every row with its signers, values, and status. A row with a problem is marked Excluded with the reason, and won't be sent. Click Preview on any ready row to see that person's document with their details filled in. You can download the excluded rows, fix them, and send them in a new batch.
Send the batch
Add a Personal note if you like. It goes in every invitation email. Automatic reminders are on by default, so anyone who hasn't signed is reminded on days 3, 6, and 10. Turn on Save completed documents to Google Drive to file every signed copy in your Drive as it finishes. Then click Send. The button shows how many documents will go out.
Track and remind a batch
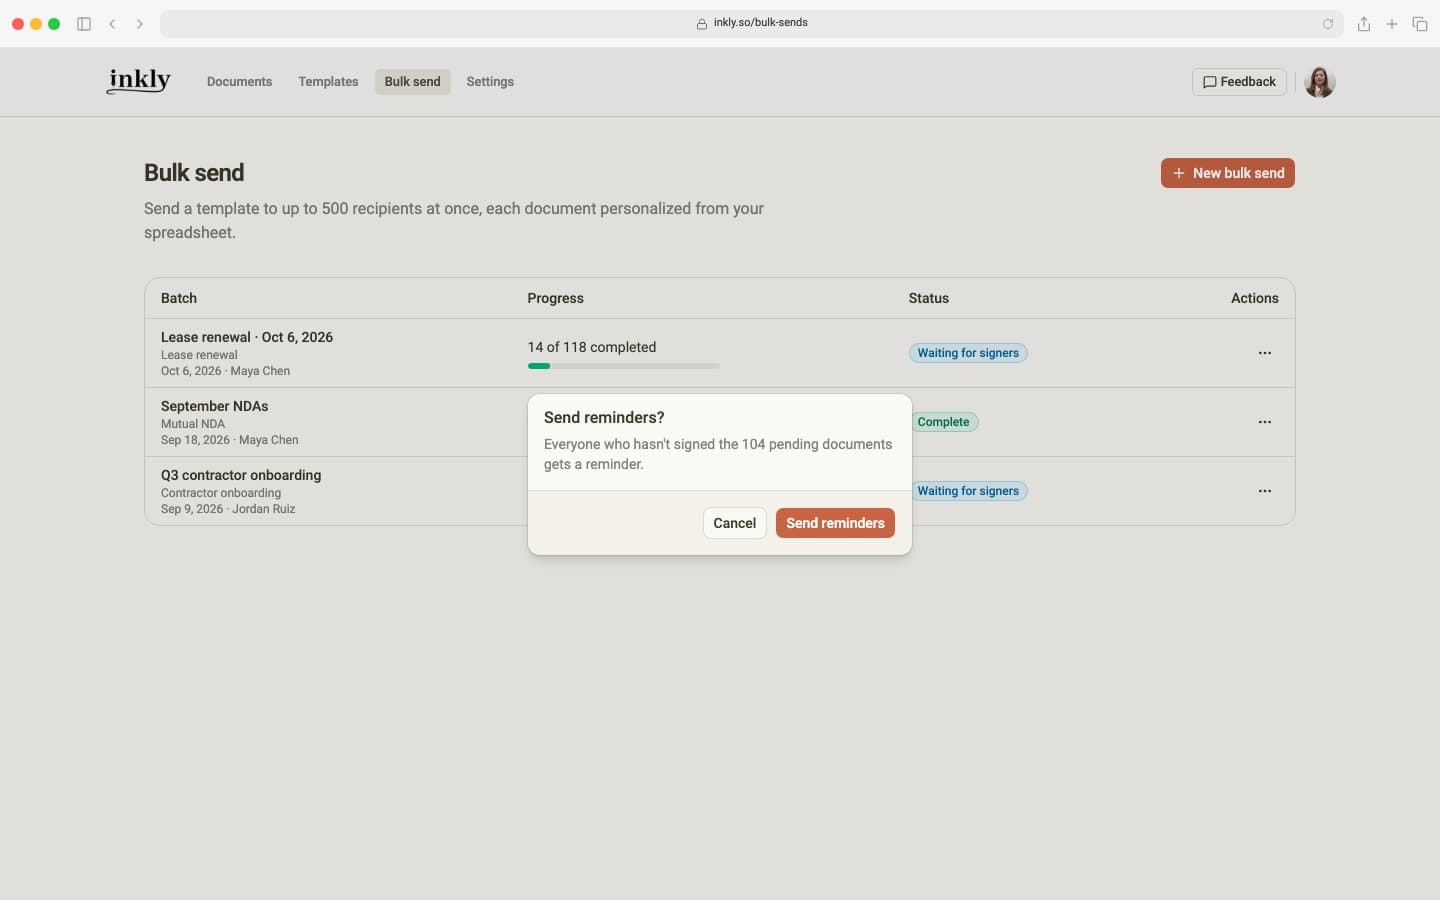
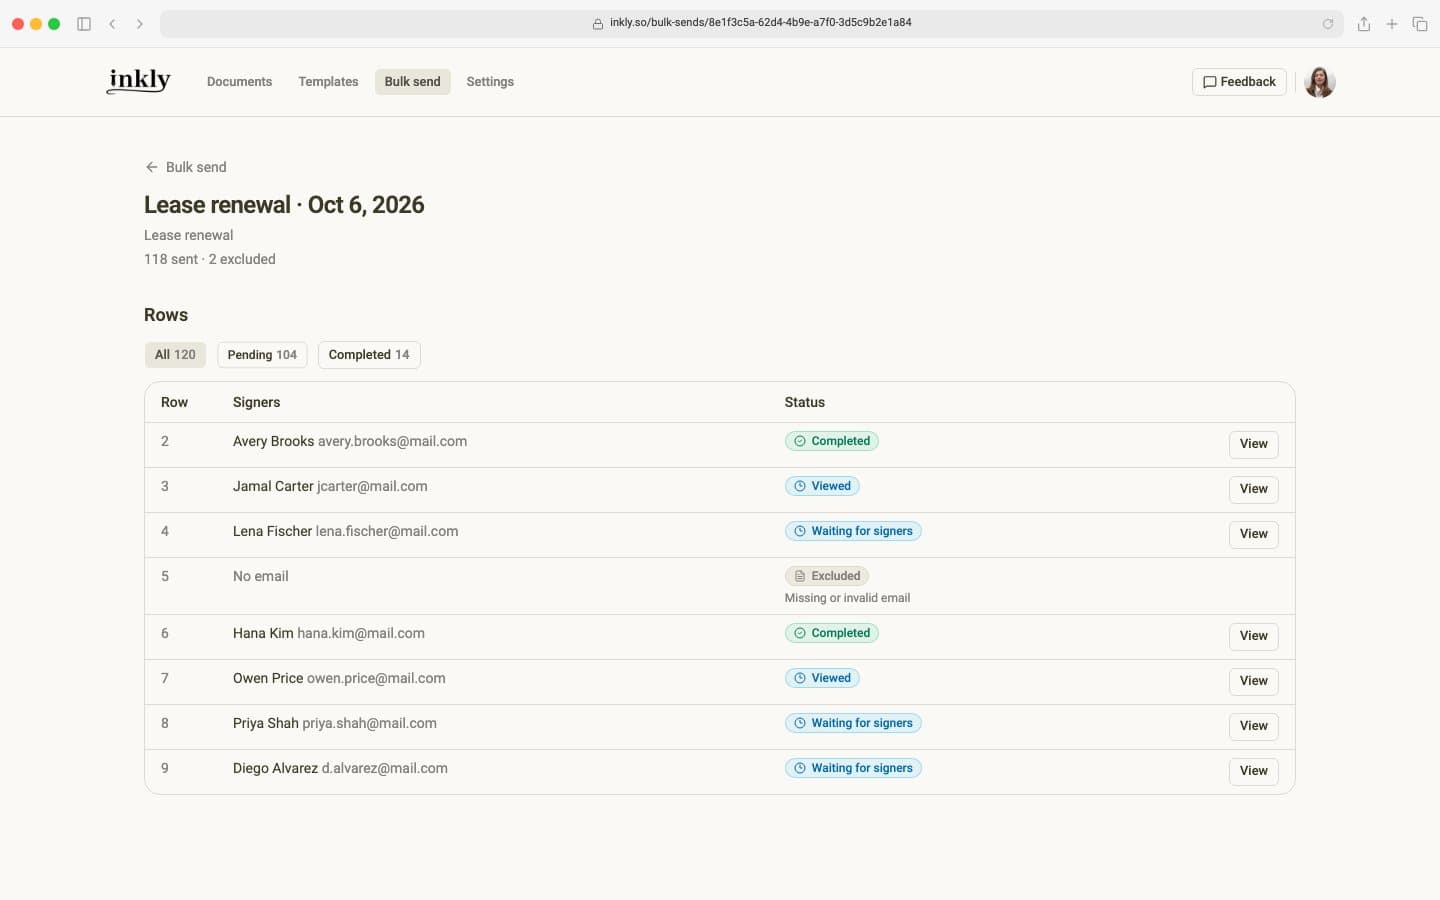
The Bulk send page lists every batch with how many documents are complete. To see who has signed, open the batch's ⋯ menu and choose View details. Each row shows whether that person has signed, opened the document, or is still waiting, and Pending narrows the list to just the people who haven't signed. Click View on a row to open that document and remind just that person.
To remind everyone who hasn't signed at once, choose Send reminders from the same ⋯ menu. Download status CSV gives you every row's status as a spreadsheet. You also get a daily email with the batch's progress, and one when everyone has finished.