Send a document for signature
Updated October 7, 2026
What you need
- An Inkly account. It's free to sign up.
- The document as a PDF, on your computer or in Google Drive.
- The email address of everyone who needs to sign.
Send a document, step by step
Upload your PDF
In Documents, click Upload document and choose Upload from computer. To use a file you keep in Google Drive, choose Import from Google Drive instead. The document opens in the editor as a draft.
Place the first signer's fields
The editor starts with First party selected under Recipients. Click a field type under Add fields, such as Signature, then click the page where it belongs. Add a Date, Name, or any other field the same way. Drag a field to move it, or drag its bottom-right corner to resize it.
Click a field to open the bar underneath it. From there you can change which signer it belongs to, make it required or optional, duplicate it, or delete it.
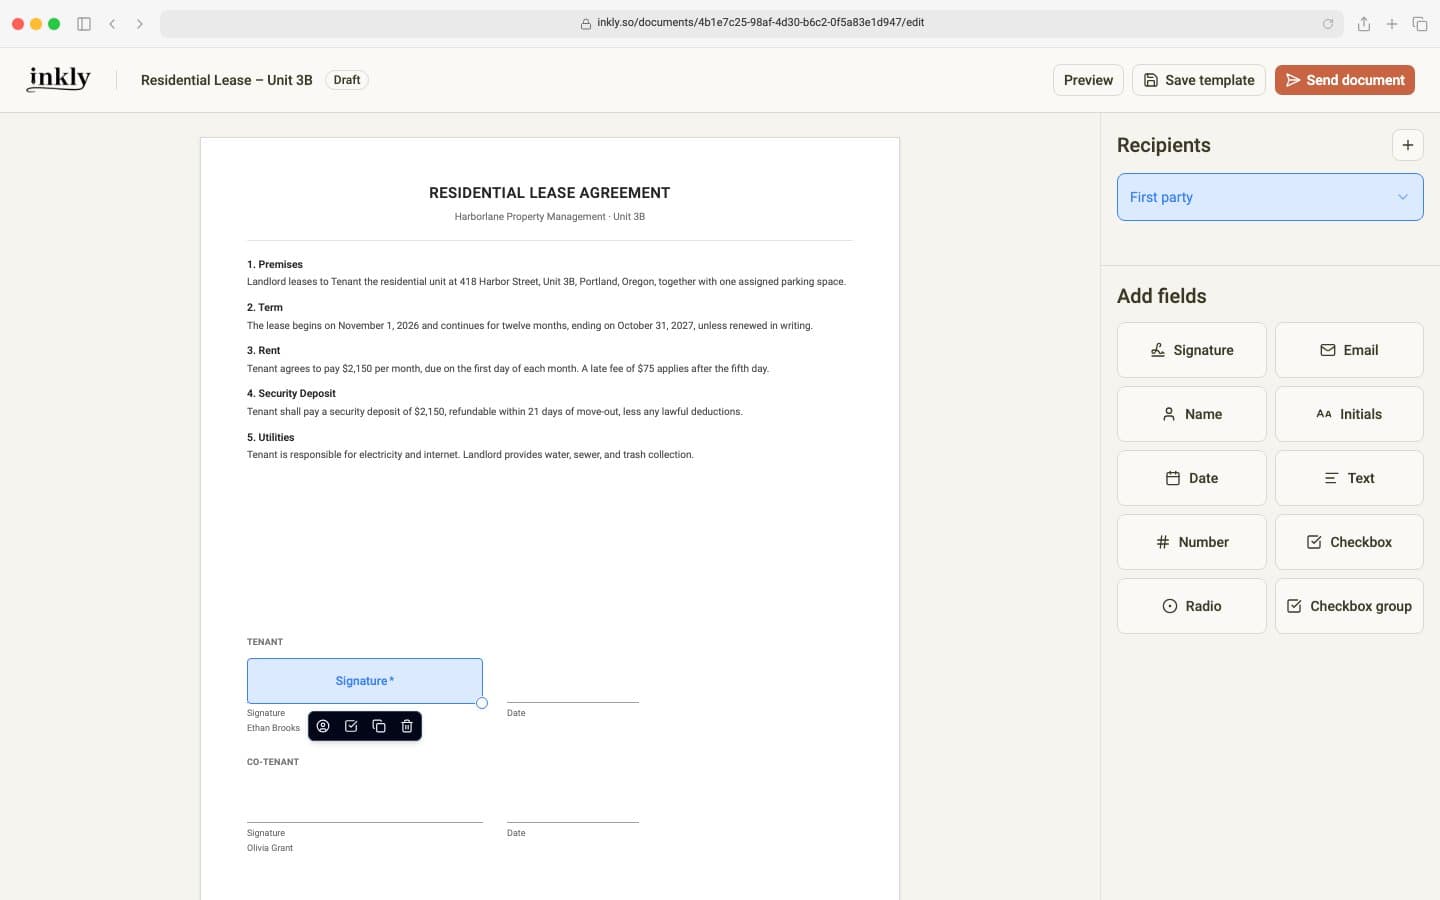
Add more signers
Open the signer list under Recipients and choose Add Second party, or click + beside Recipients. Add a third signer and more the same way. Then place their fields. Every field belongs to whoever is selected when you place it, and each signer has their own color, so you can see at a glance who fills in what. Every signer needs at least one field of their own.
Enter emails and send
Click Send document at the top of the editor. Enter each signer's email address. Their name is optional and is used to greet them in the email. People you've sent to before are suggested as you type. Then click Send document.
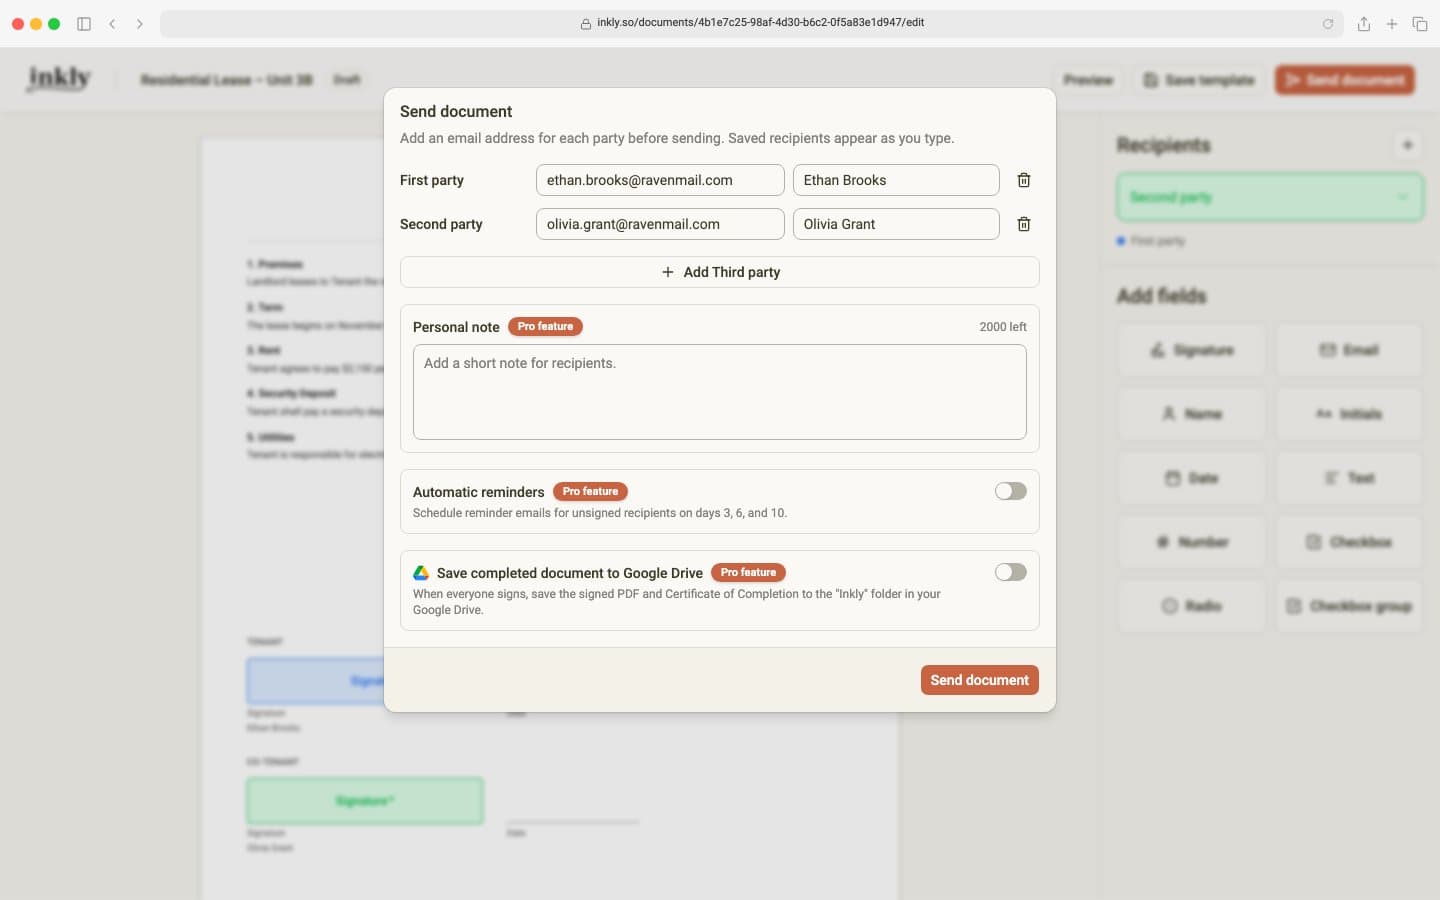 On Pro and Teams, the same dialog lets you add a Personal note to the email, turn on Automatic reminders, and save the finished document to Google Drive.
What your signers see
Each signer gets an email from Inkly with a Review and sign button. The link is private to them and opens the document in their browser, where Inkly walks them through their fields one at a time. They can sign by drawing, typing, or uploading their signature, on a computer or a phone, without creating an account. If they don't want to sign, they can decline and give a reason.
After you send
You get an email each time someone signs, and the document's page in Documents shows who has signed and a timeline of every event. When the last person signs, everyone, including you, gets an email with the signed PDF and the Certificate of Completion attached.
Sending the same document often? Save it as a template so its fields are ready next time. See how to create a reusable template.