Share a public signing link
Updated October 30, 2026
What you need
- A Pro or Teams plan.
- A saved template, such as a waiver, intake form, or permission slip.
Create a public signing link, step by step
Save the document as a template
A public signing link is built on a template. Open your draft in the editor and click Save template, or create a template from Templates.
Open Public signing link…
On the Templates page, open the template's ⋯ menu and choose Public signing link…
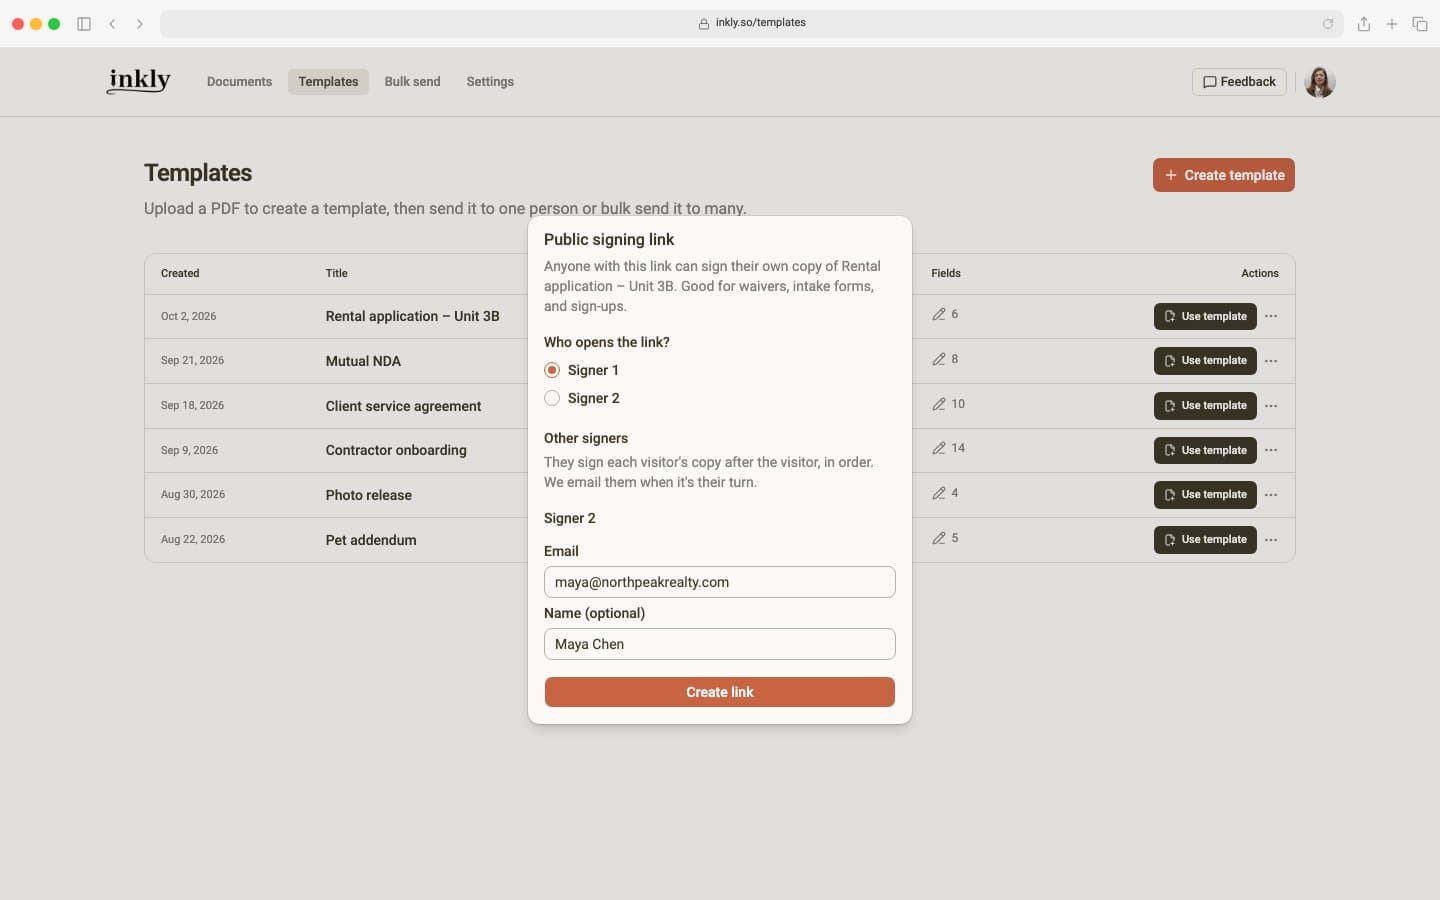
Choose who opens the link
If the template has more than one signer, pick one under Who opens the link? Whoever opens the link fills in that signer's fields. With one signer, this step is skipped.
Add the other signers
Every other signer is listed under Other signers. Enter an email for each, and a name if you like. They sign each visitor's copy after the visitor, in order, and Inkly emails each of them when it's their turn.
To countersign every copy yourself, click Use my email on that signer. Then click Create link.
Share it three ways
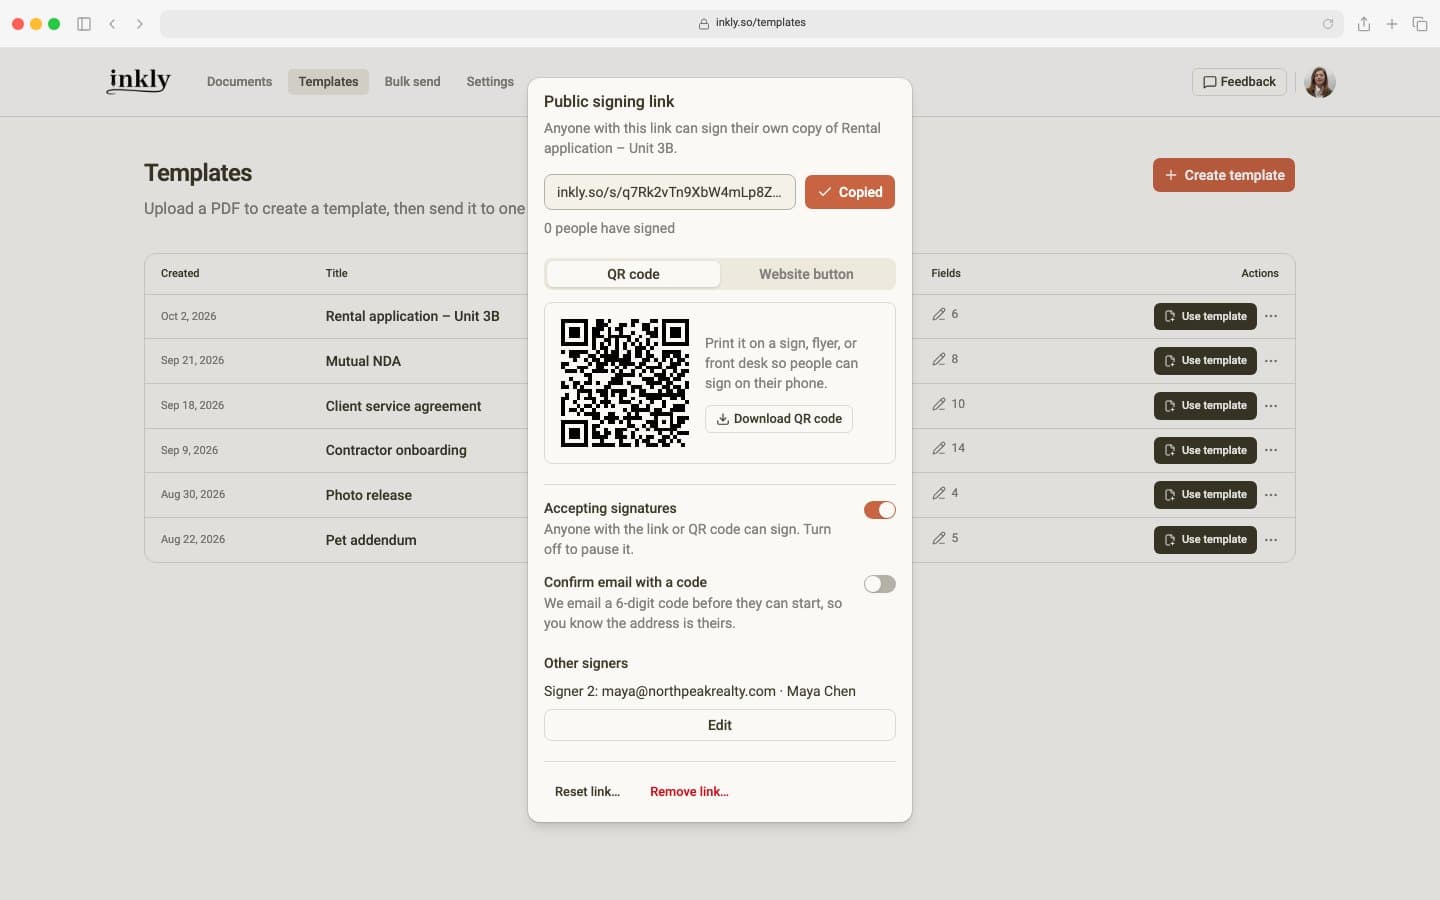
The dialog shows your link, such as inkly.so/s/…, with a copy button. Paste it into a text, an email, or a social media post. Under it, Inkly counts how many people have signed.
On the QR code tab, click Download QR code for a PNG to print on a sign, a flyer, or a front-desk card. People scan it and sign on their own phone.
On the Website button tab, click Copy code and paste it into your website, such as Squarespace, Wix, or WordPress. It adds a Sign now button that opens the link in a new tab.
What the visitor sees
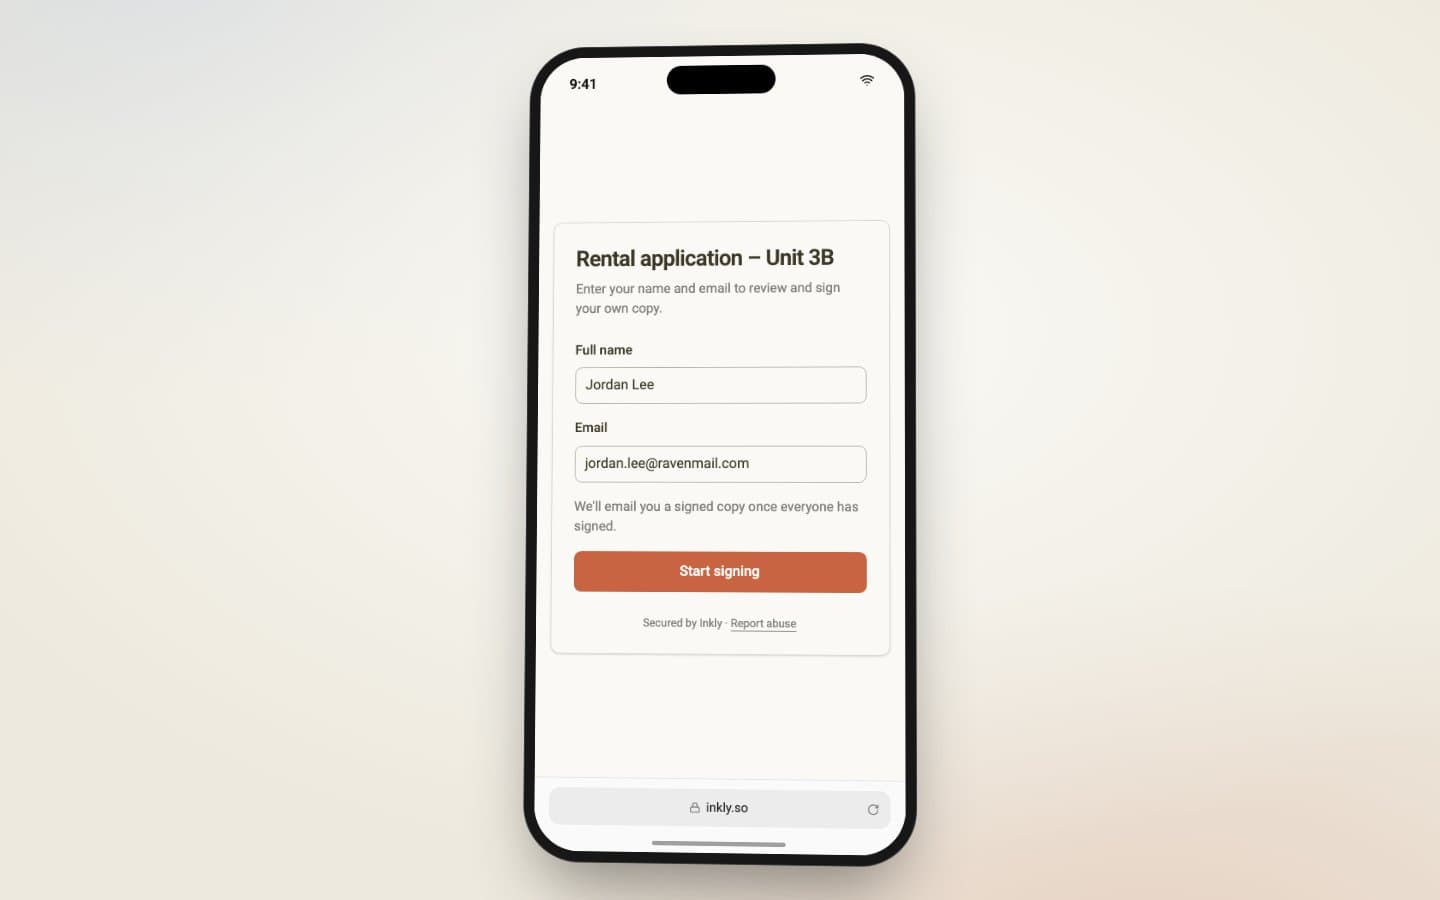
The link opens a page with the template's title, and your logo if you've added custom branding. They enter their Full name and Email, click Start signing, and sign their own copy. No account is needed. Once everyone has signed, Inkly emails them the signed copy.
To check that the email belongs to them, turn on Confirm email with a code. The visitor then clicks Email me a code and enters the 6-digit code before they can start. A code works for 10 minutes. The Certificate of Completion records whether the email was confirmed with a code or entered by the signer.
Where signed copies appear
Once a visitor signs, their copy appears in Documents, titled with the template's name. Its page says From a signing link. Any other signers then get their invites in turn, and you get your usual signed and completed emails, as for any document.
Pause, reset, or remove the link
Open Public signing link… again from the template's ⋯ menu. Turn off Accepting signatures to pause the link: people who open it see that it isn't available. Turn it back on and the same link and QR code work again. Under Other signers, click Edit to change their emails and names.
Reset link… issues a new link, and the old link and any printed QR codes stop working right away. Remove link… deletes the link for good; the template stays.
People who already started can still finish after you pause, reset, or remove the link. To change who opens the link, remove it and create a new one.
Know who needs to sign? Send it to them instead: how to send a document for signature.