Add a checkbox group
Updated October 7, 2026
What you need
- An Inkly account. It's free to sign up.
- A document open in the editor.
Add a checkbox group, step by step
Place the first box
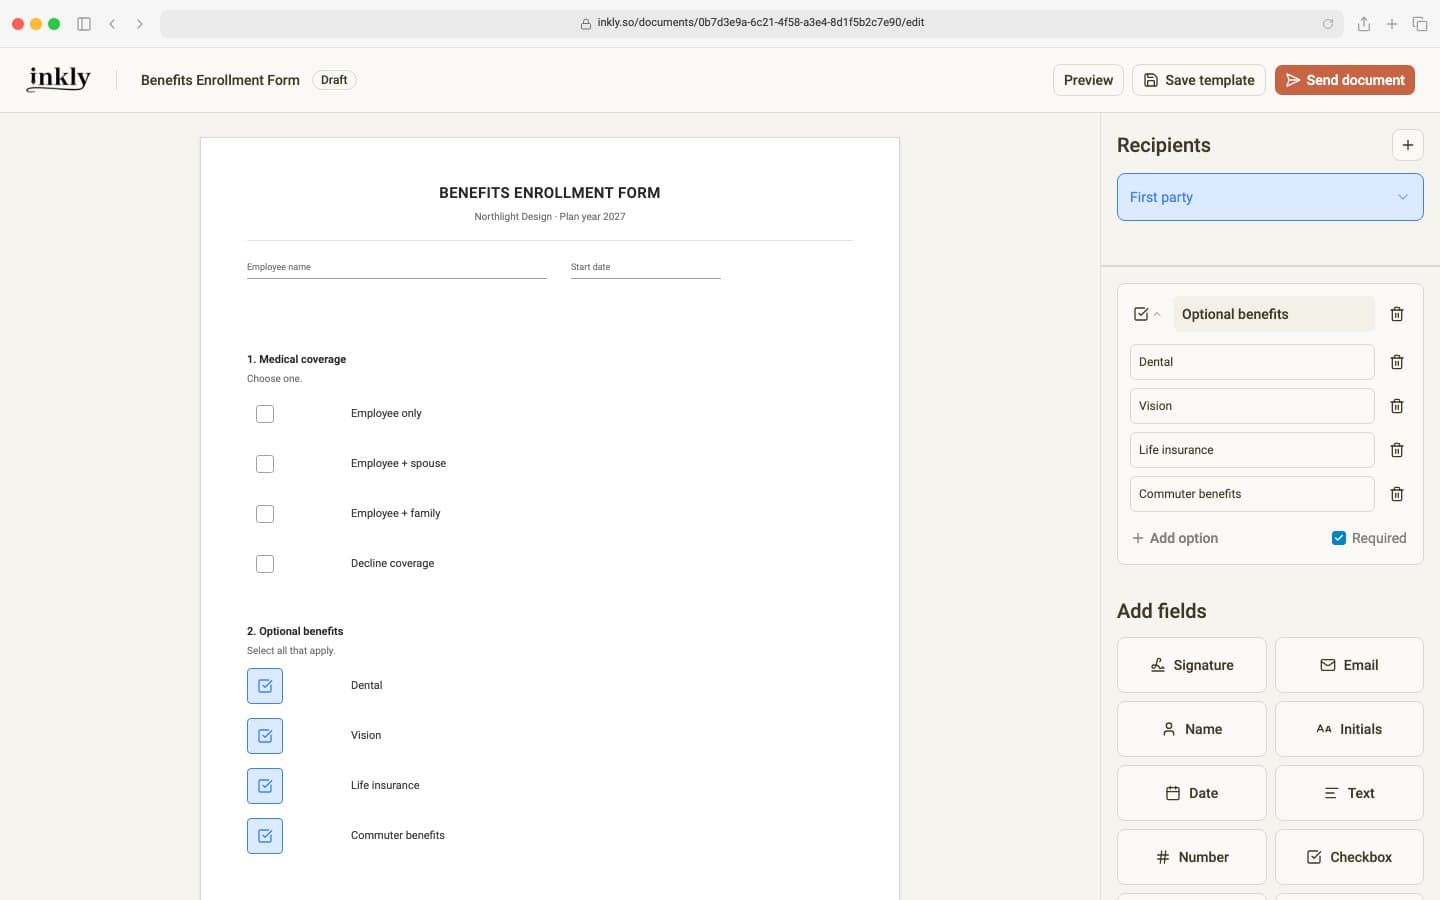
Under Recipients, select the signer who should answer. Click Checkbox group under Add fields, then click the page where the first box goes. The group opens in the side panel with two options: the one you placed and one waiting to be placed.
Name the group and label each option
Rename Checkbox group 1 after the question, like Optional benefits, so signers know what they're answering. Then type a label for each option.
Place the rest of the boxes
Click the + inside an option that isn't placed, then click the page where its box goes. Use Add option for as many more as you need.
Decide whether an answer is required
With Required ticked, which is the default, the signer must tick at least one box. Untick it to make the question optional.
Checkbox group, Checkbox, or Radio
All three ask a signer to choose. Pick the one that matches how many answers make sense.
| Field | Use it when | Example |
|---|---|---|
| Checkbox group | Several answers can apply. | Which benefits do you want? Dental, Vision, Life insurance. |
| Checkbox | One box to tick or leave. | I agree to the terms. |
| Radio | Exactly one answer. | Employee only, Employee + spouse, or Decline coverage. |
For exactly one answer, see how to add radio buttons, which can also ask the signer to initial their choice.
What your signer sees
When the signer reaches the question, Inkly shows the group's name with every option as a button they can tap to tick or untick, on a phone or a computer. They can also tick the boxes right on the page. The signed PDF shows a tick in every box they chose.