Request files from signers
Updated October 29, 2026
What you need
- A Pro or Teams plan.
- A draft document with at least one signer.
Request files, step by step
Choose the signer
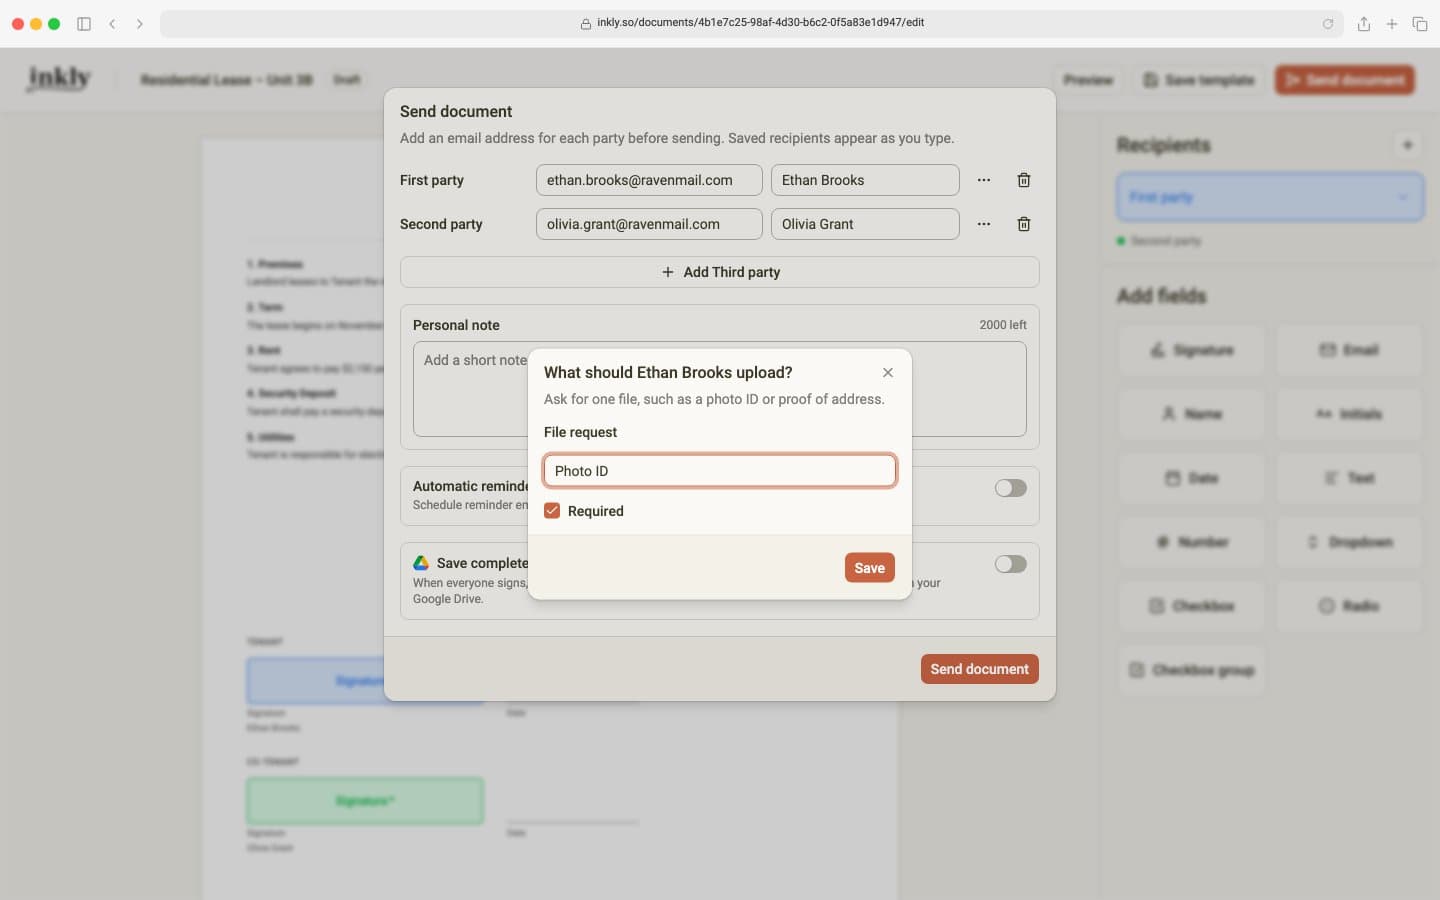
Open Send document in the editor. In the signer's ⋯ menu, choose Request a file….
Name the file
Under What should [name] upload?, enter a name such as Photo ID or Proof of address. Leave Required on if they must provide it. Click Save.
Check your requests and send
Each request appears as a chip under the signer. Click it to edit, or use its × to remove it. Optional requests show · optional. You can request up to 5 files per signer and 10 per document. Send when ready.
What the signer sees
The signing page tells them up front which files they will need. After their last field, Upload your files lets them choose a file for each request. On a phone, the system picker can offer the camera, photo library, or files.
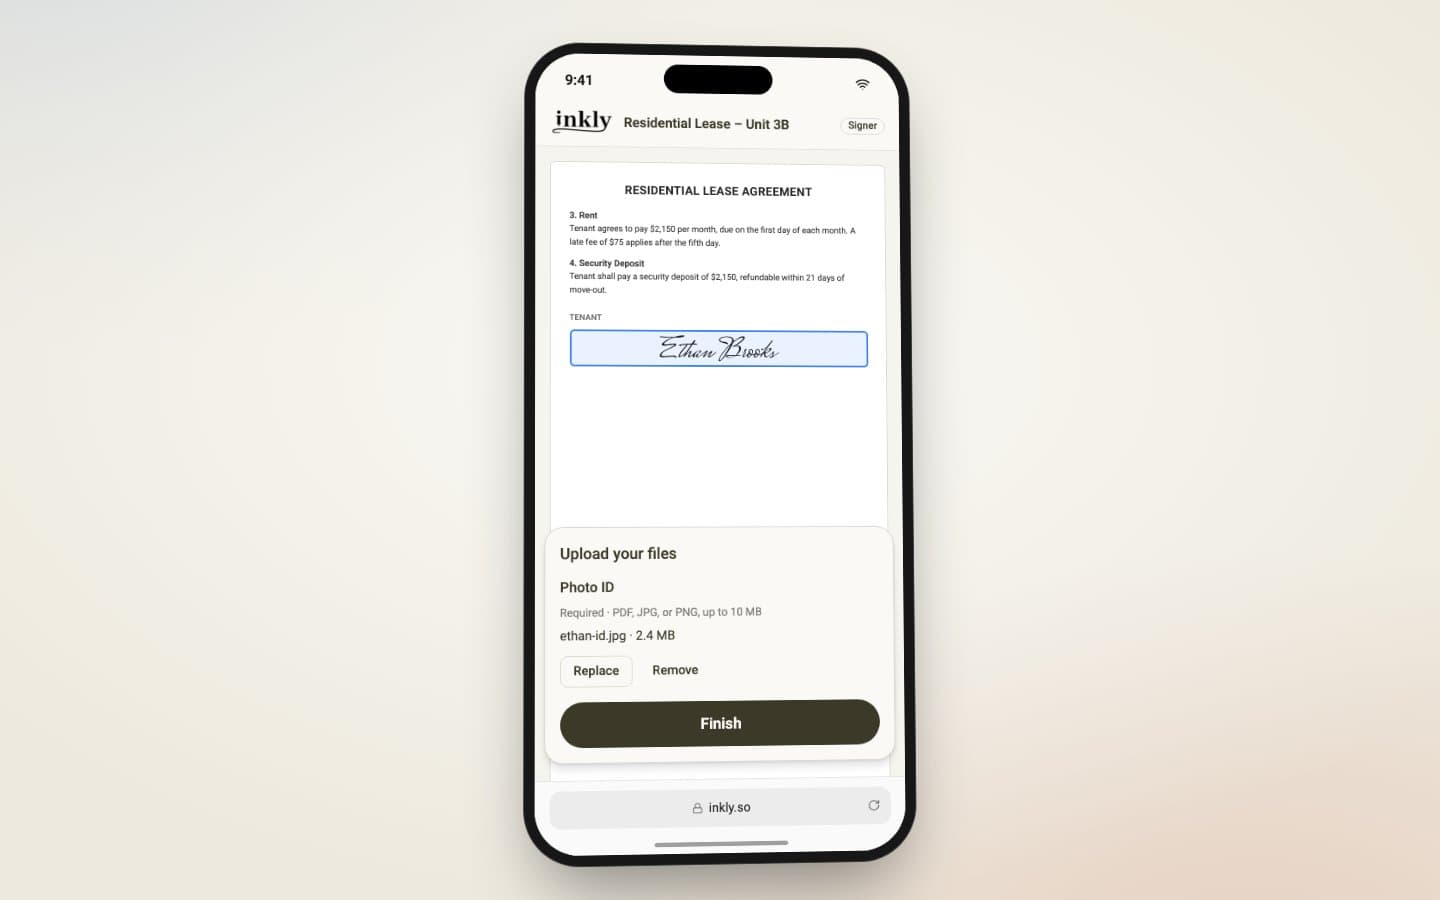
Each file must be a PDF, JPG, or PNG up to 10 MB. After upload, they can Replace or Remove it. Finish waits until every required file is uploaded and any upload has finished.
Download the files
Once that signer finishes, open the document's Attachments section. Files are grouped by signer and request, with a Download button. An optional request they skipped shows Not provided.
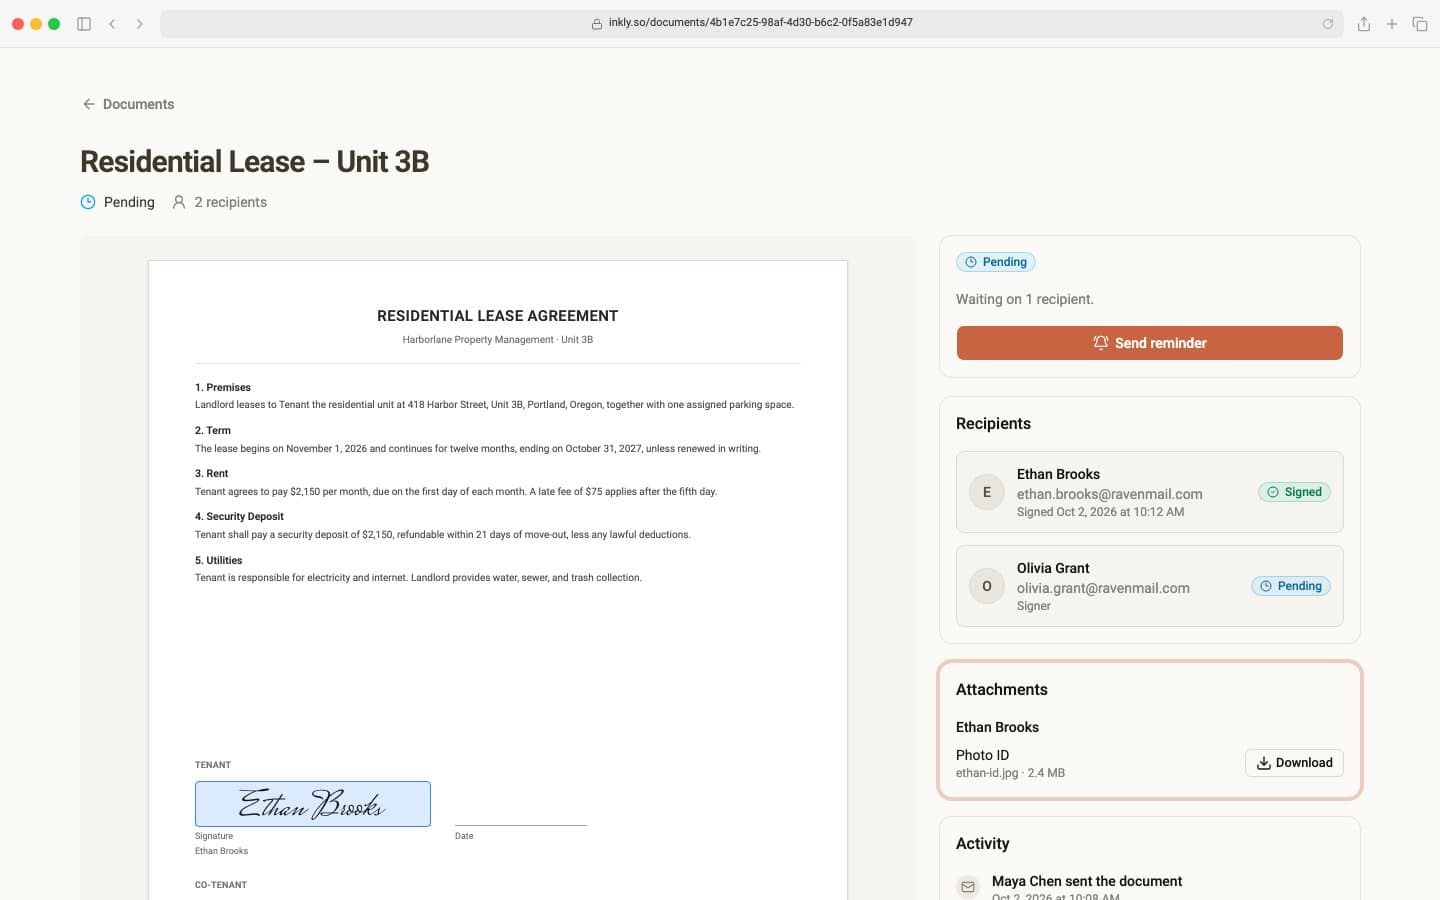
Your completion email lists how many files were uploaded and links to the document page. Requested files are not attached to emails or sent to CC recipients. They remain separate from the signed PDF. The Certificate of Completion records each file's name, type, size, SHA-256 fingerprint, and upload time.
Saving the completed document to Google Drive includes its requested files alongside the signed PDF and certificate in your Inkly folder.
If signing stops
A signer who declines does not hand over their files: those uploads are deleted. Voiding a document deletes all its uploaded files. Deleting the document deletes its files from Inkly; copies already saved in your Google Drive stay there.
New to sending? Start with how to send a document for signature.