Add a dropdown
Updated October 28, 2026
What you need
- An Inkly account. It's free to sign up.
- A document open in the editor.
Add a dropdown, step by step
Place the dropdown
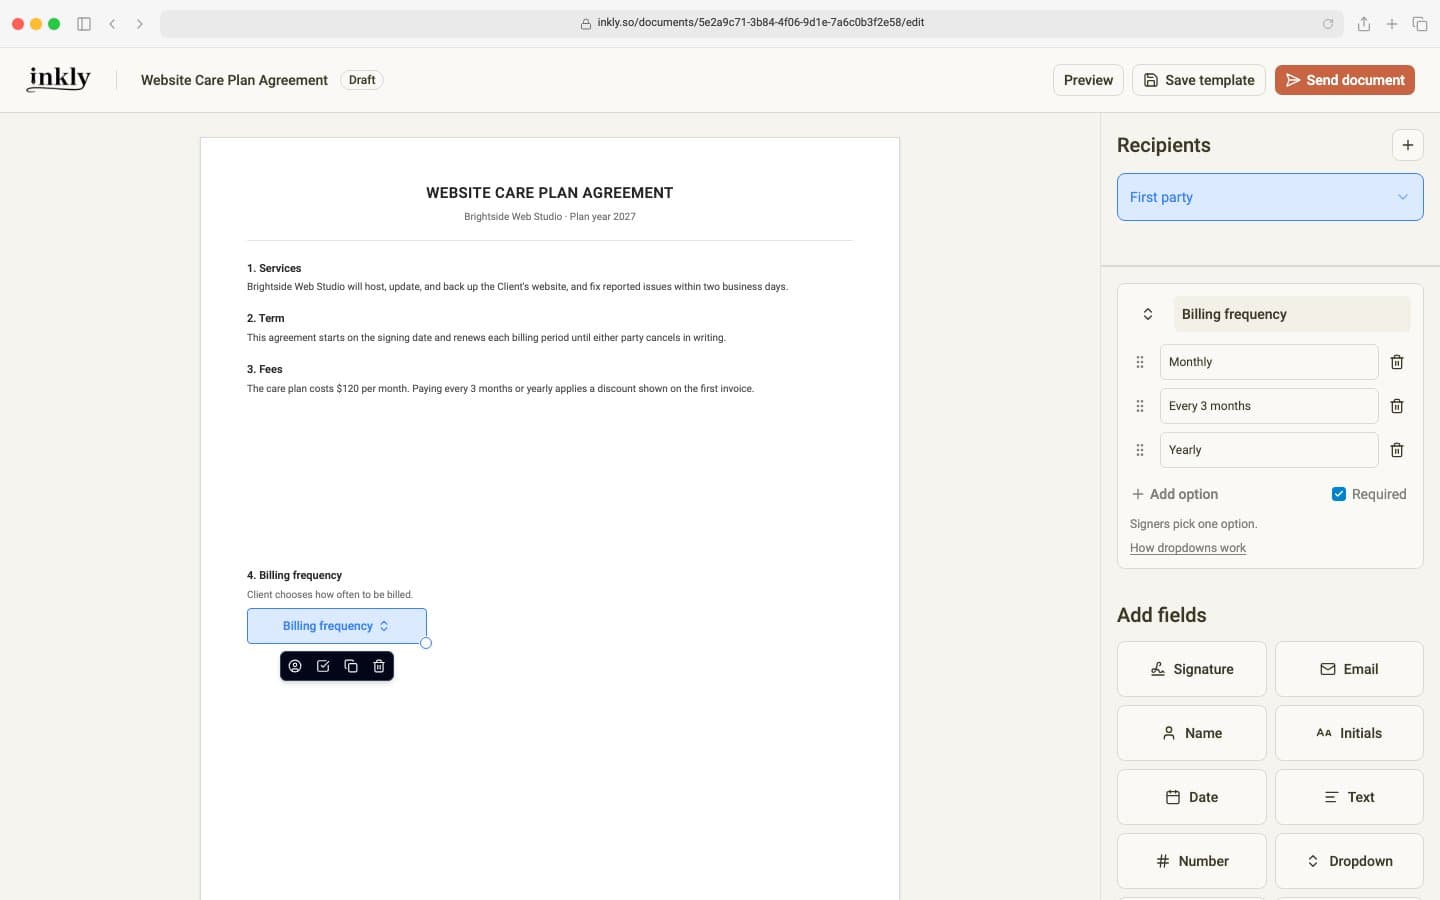
Under Recipients, select the signer who should answer. Click Dropdown under Add fields, then click the page where the answer should print. The dropdown opens in the side panel.
Write the question
Click the dropdown's name, such as Dropdown 1, and type the question, like Billing frequency. Signers see it as the heading above the menu. If you leave it, they see Choose one option instead.
Add the options
Type an answer into Option 1 and Option 2. Click Add option for more. Drag an option by its handle to change where it sits in the list; signers see the options in this order.
Decide whether an answer is required
New dropdowns are Required, so the signer must choose before finishing. Untick Required to make the question optional.
Dropdown or radio buttons: which to use
Both let a signer pick exactly one answer. A dropdown keeps the choices in a menu and takes up one small box on the page, so it suits a long list, like a state or a start month, or a page with little room. Radio buttons place every option on the page, so they suit a short list the signer should see at a glance, and the signed PDF shows which option was marked among the others. See how to add radio buttons.
What your signer sees
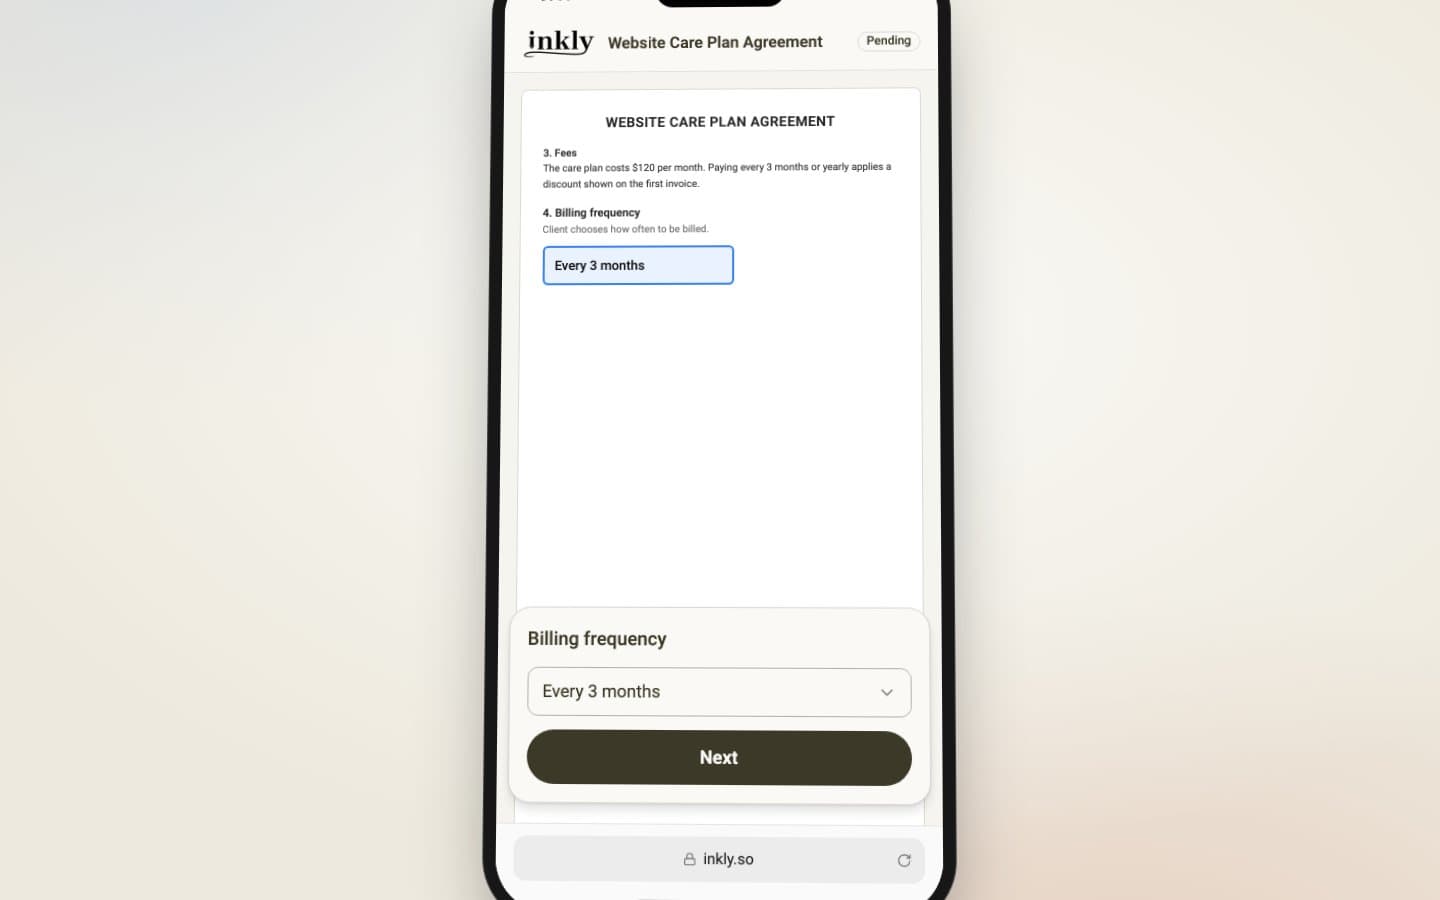
When the signer reaches the dropdown, Inkly shows your question and a menu of the options. On a phone, it opens the phone's own picker. If the dropdown is required, they can't move on until they choose. On the signed PDF, only their answer appears.