Invite your team
Updated October 23, 2026
What you need
- A Teams plan.
- You're the primary owner or an admin of the workspace.
- Each teammate's email address.
Invite your team, step by step
Open Team
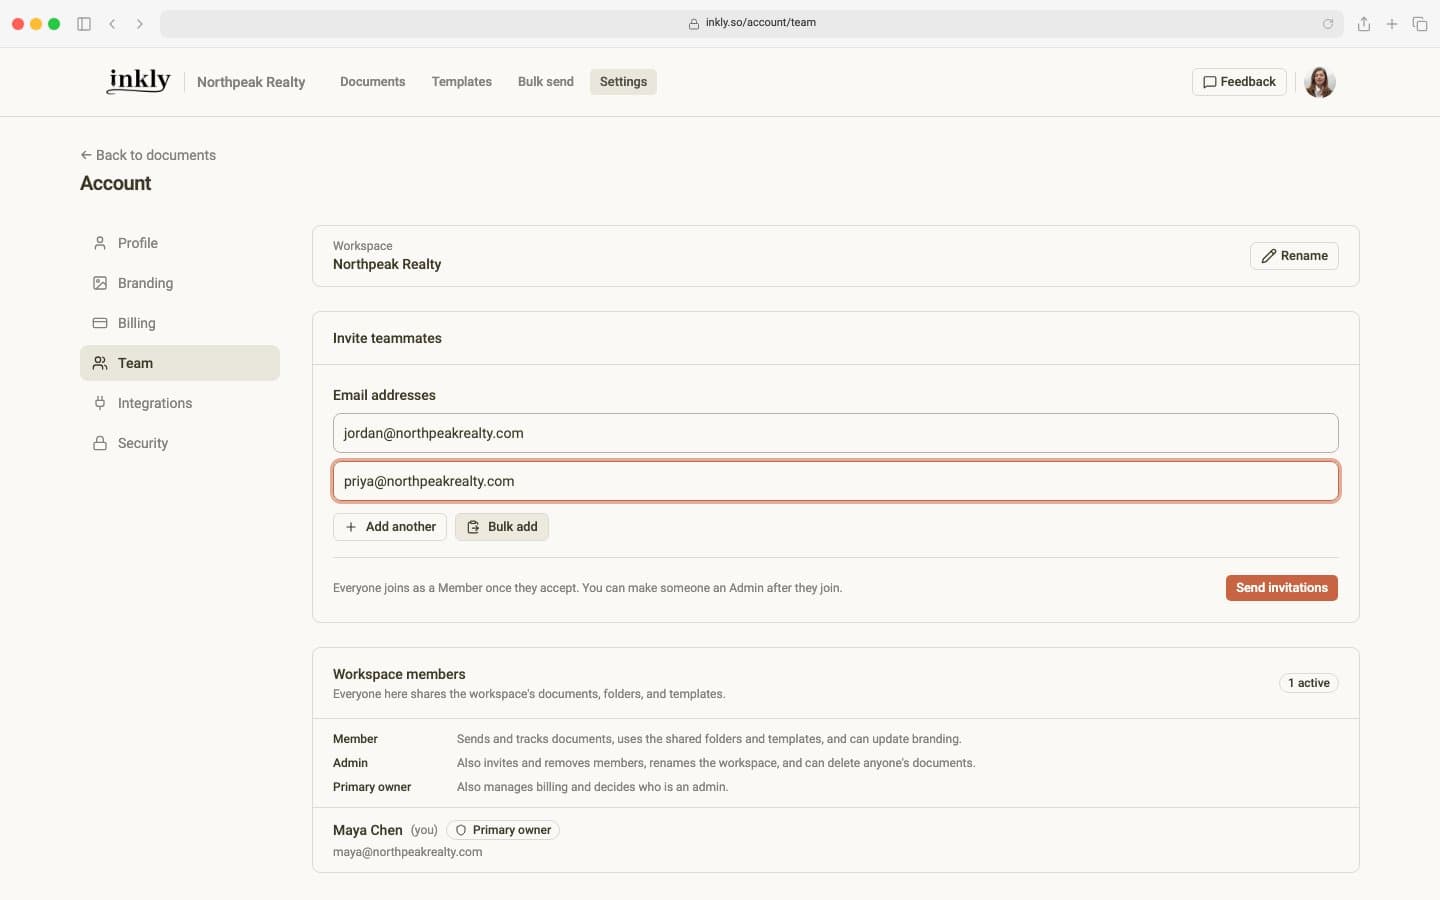
Click Settings in the top bar, then Team. The page lists everyone in your workspace and what each role can do.
Enter your teammates' emails
Under Invite teammates, type a teammate's email address. Click Add another for each extra person, or click Bulk add to paste a whole list copied from a spreadsheet or an email. Then click Send invitations.
Your teammate accepts
Each person gets an email from Inkly with an Accept invitation button. They sign in or create a free account with that same email address, then click Join workspace. They now appear under Workspace members.
Invitations expire after 7 days. Until someone joins, they're listed under Pending invitations, where you can Copy link to send it yourself or Revoke it. Once it expires, click Send new invite.Make someone an admin (optional)
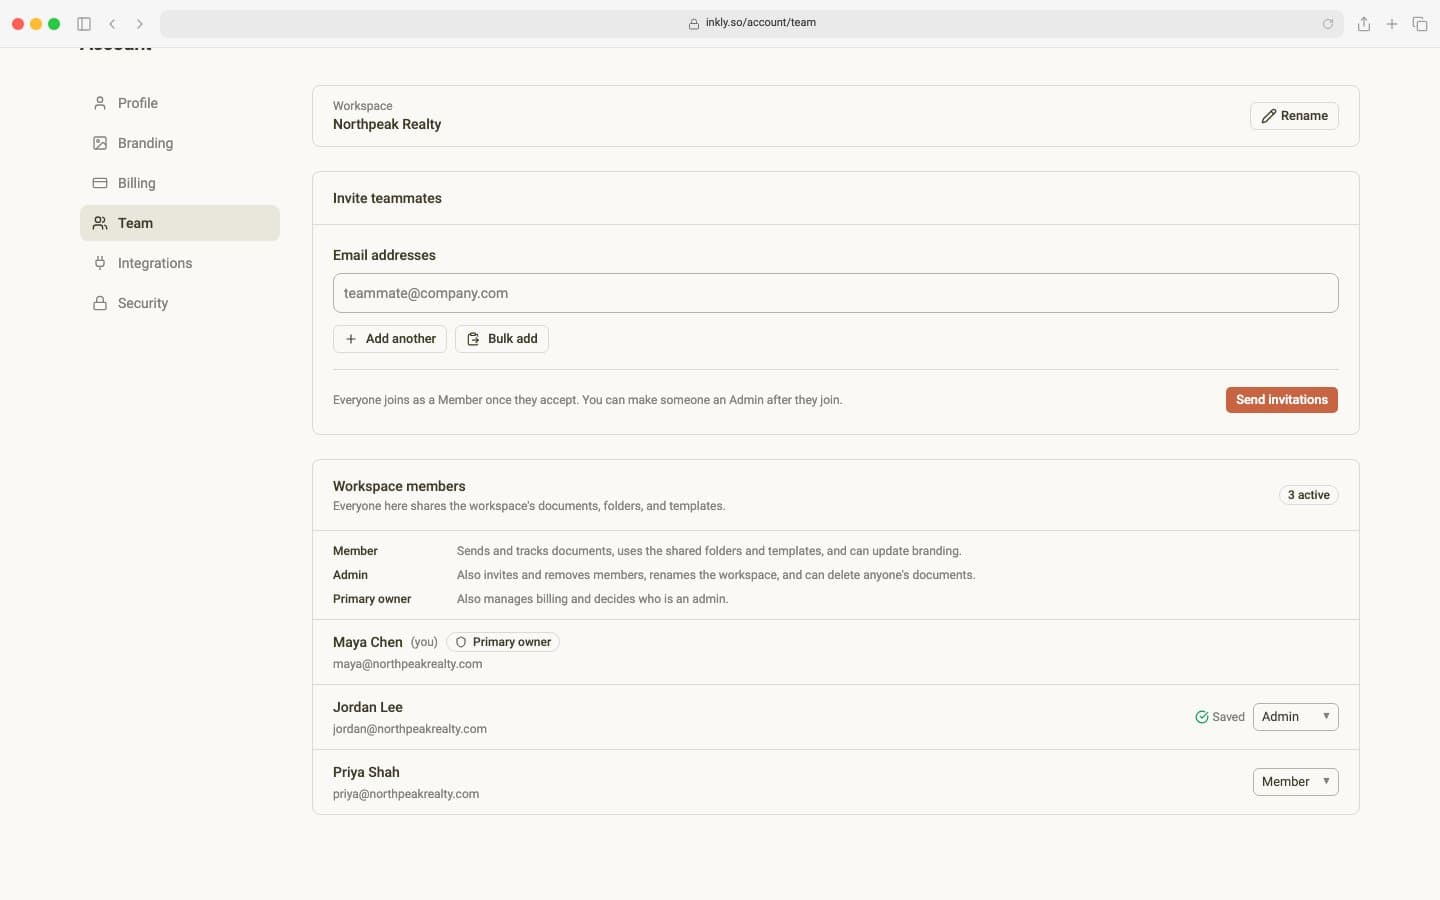
Everyone joins as a Member. If you're the primary owner, choose Admin from the role menu beside a teammate's name and click Save.
What each role can do
| Role | What they can do |
|---|---|
| Member | Sends and tracks documents, uses the shared folders and templates, and can update branding. |
| Admin | Everything a member can, plus inviting and removing members, renaming the workspace, and deleting anyone's documents. |
| Primary owner | Everything an admin can, plus managing billing and deciding who is an admin. This is the person who set up the workspace. |
What your team shares
Documents, folders, templates, and branding belong to the whole workspace, not to the person who made them. In Documents, everyone's sends appear together with the sender beside each one. Choose Sent by me above the list to see only your own, or Everyone to see them all again.
Rename or switch workspaces
The workspace name appears next to the Inkly logo in the top bar and in invitation emails. To change it, an admin clicks Rename in the bar at the top of the Team page, types the new name, and clicks Save.
If you belong to more than one workspace, click your profile picture in the top right and choose the workspace you want under Workspaces.
Leave a workspace
Open Settings, then Team, and click Leave workspace. You lose access right away, and the documents and templates you created stay with the workspace. An admin can invite you back later. The primary owner can't leave the workspace they pay for.